SILVERPOINT
“take a style of silver… start to copy the easiest possible subjects, to get your hand in; run the style
over the little panel so lightly that you can hardly make out what you first start out to do; strengthening
your strokes little by little, going back many times to produce shadows. And the darker you want to
make the shadows in the accents, the more times you go back to them; and so conversely, go over the
reliefs only a few times.”
…“ Cennino Cennini 14th century
To create a silverpoint drawing a tool known as a stylus, a thin metal rod with a metallic tip of silver, is used on a specially prepared surface know as a ground layer. The metallic point is abraded by the ground layer during the drawing process leaving a trail of particles behind in its wake. These particles are the marks of the drawing.
The stylus may be made from many different metals. Lead, lead-tin alloys, gold, bronze, and silver have all been used for metalpoint drawings. Each of the metals has a unique character and quality in the marks it leaves behind. Lead and lead-tin leave a dark but blunt line, gold leaves a grey line which will not tarnish over time. Silver, the preferred metal, leaves a very delicate mark which tarnishes to a lovely warm tone overtime as it reacts with the environment. The term silverpoint applies only to the drawings made with silver. The term metalpoint includes silverpoint drawings as well as drawingsmade with any of the other metals.
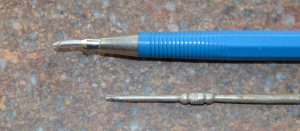
A modern silverpoint tool and a medieval stylus.
THE MODERN STYLUS
Commercially prepared stylus’ are available. 12 gauge silver wire, either sterling or fine silver, and a mechanical lead pencil holder work very well. Alternate metal wires including gold and copper can be used. It may be necessary to improvised devises to hold these wires.
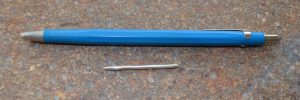
A mechanical pencil lead holder and silver wire
THE GROUND LAYER
Silverpoint drawing must be done on a specially prepared surface layer know as a ground. A traditional ground layer is made up of hide glue and artists pigments. It is actually a thin waterbased paint. The ground layer covers the entire surface of the paper, parchment or whatever surface upon which the drawing will be made.
Commercially prepared silverpoint grounds are available.
PREPARATION OF A TRADITIONAL GROUND
Dry ground pigments are mixed with water to form a paste. Almost any pigments will work in this application. Titanium white is recommended. To make a colored ground mix in a tiny bit of a desired pigment with white, keep it as pale as possible.
Add a weak solution of warm hide glue to the pigment paste, there is no specific amount of glue to pigment, you just want to make a thin, liquid paint. Thin hide glue is made at ratio of 1 part glue to 18 – 20 parts water.
Stir the glue and pigment paste together to make a well blended, thin paint.
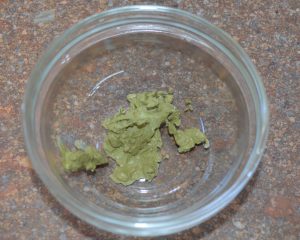
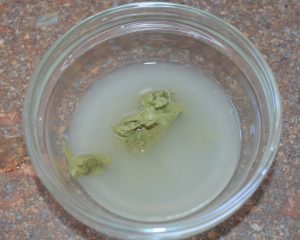
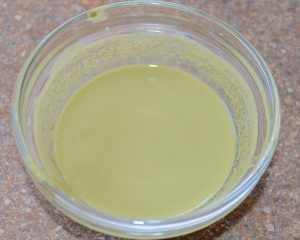
Green pigment made into paste Thin hide glue added to the pigment paste Glue and pigment mixed together
APPLICATION OF THE GROUND LAYER
– Stretch paper as for watercolor painting if desired, or simply tape it with painters tape to a flat surface. Typically a good quality, acid-free, white watercolor paper with a smooth finish, bristol board paper or other smooth finish papers suitable for wet applications are used.
-Apply the ground to the paper using a smooth flat brush, or a large round watercolor brush, apply the liquid ground in several thin coats of alternating directions. Allow the paint to dry between coats.
-Work with long straight brush-strokes, use as little paint as possible to avoid soaking the paper.
-When the ground layer has dried sand it very lightly with fine, dry finishing sand paper, or burnish smooth with a gilders burnisher.
DRAWING
-Draw in linear fashion with the stylus. The point of the silver wire should not be so sharp or irregular that it scratches or scores the ground surface. It should glide smoothly across the paper.
-Draw very lightly at first, developing darks by repeated marking rather than through increased pressure.
-A cross-hatch technique works very well in Silverpoint though any style is possible with experimentation.